- 223-5764 : Latitude D630, Intel Core 2 Duo T9500, 2.60GHz, 800Mhz, 6M L2 Cache, Dual Core
- 310-9094 : US - System Documentation Power Cord, Latitude D630
- 420-8734 : Vista Business Service Pack 1 with media, English, Latitude
- 420-8010 : Roxio Creator Dell Edition,9.0 Dell Latitude/Mobile Precision
- 430-2375 : Intel 4965 WLAN (802.11a/g/n) mini Card Latitude, Factory Install
- 320-5289 : 14.1 inch Wide Screen WXGA+ LCD for Latitude D630
- 374-7297 : CFI,B8JV01,Information,Label, Large,Factory Install
- 366-1040 : Custom Asset Report
- 365-0257 : CFI Routing SKU
- 320-5485 : 128MB NVIDIA Quadro NVS 135M Latitude D630
- 341-6439 : 80GB Free Fall Sensor Hard Drive 9.5MM, 7200RPM,Latitude
- 430-2275 : Dell Wireless 360 VSTA Bluetooth Module for Vista Latitude
- 366-1552 : PCA custom project fee
- 312-0484 : 6-Cell/56 WHr Primary Battery Latitude D630
- 420-9184 : Cyberlink Power DVD 8.1,with Media,Dell Latitude/Mobile Precision
- 366-1416 : Image Load
- 310-8768 : Internal English Keyboard for Latitude Notebooks
- 372-8900 : CFI,Information,D630,Nvidia, ONLY,Factory Install
- 313-5638 : 8X DVD+/-RW for Latitude D-Family
- 310-9096 : Resource DVD with Diagnostics and Drivers, Dell LatitudeD630 Notebook
- 310-8792 : Standard Touchpad for Latitude D630
- 330-0888 : Nylon Deluxe Top Load Carrying Case 14.1 inch for Latitude E/Mobile Precision
- 310-7283 : 65W AC Adapter for Latitude D-Family
- 366-1557 : Integration of a Service Tag o r Label
- 311-5689 : 4.0GB, DDR2-667 SDRAM, 2 DIMM for Dell Latitude Notebooks
- 310-8759 : You have chosen a Vista Basic System
That still doesn't mean that it didn't need a good ol' fashioned cleanup job on the inside.

Start by flipping over the laptop and remove all the battery, user accessible bays, the hard drive, and the optical drive.


Flip the computer over, open up the computer and remove the power button panel from right to left.
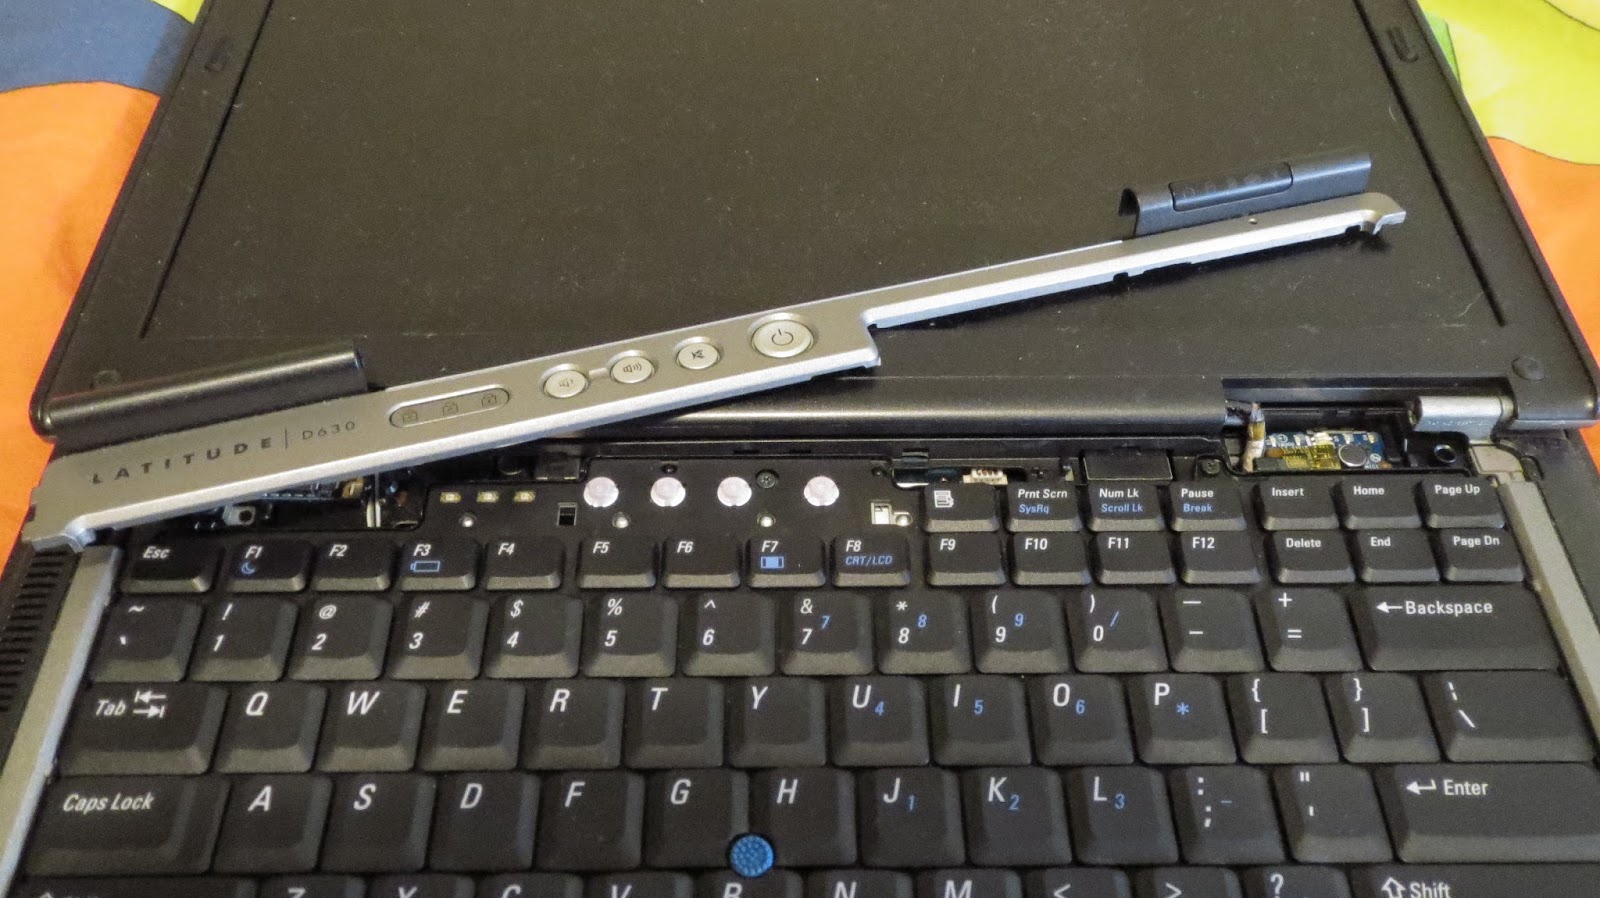
Unscrew the keyboard, release the lever holding the ribbon connector down, and pull up on the connector to detach it.


At this point, if I were lucky, then that would be the end of it, but no such luck. Time to take the WHOLE notebook computer apart.

Before moving on, take note that there's a free miniPCIe slot for a WWAN card.

The miniPCIe WLAN card an Intel 4965 WLAN (802.11a/g/n).

Moving on. Unscrew screws on the back of the computer to release the LCD.

Remove the LCD.

Unscrew any additional screws potentially holding down the top case.

Viola! The Dell Latitude pretty much 100% disassembled.

Here's the 56K Fax/Modem. Annoyingly, it's right over the chipset controller.


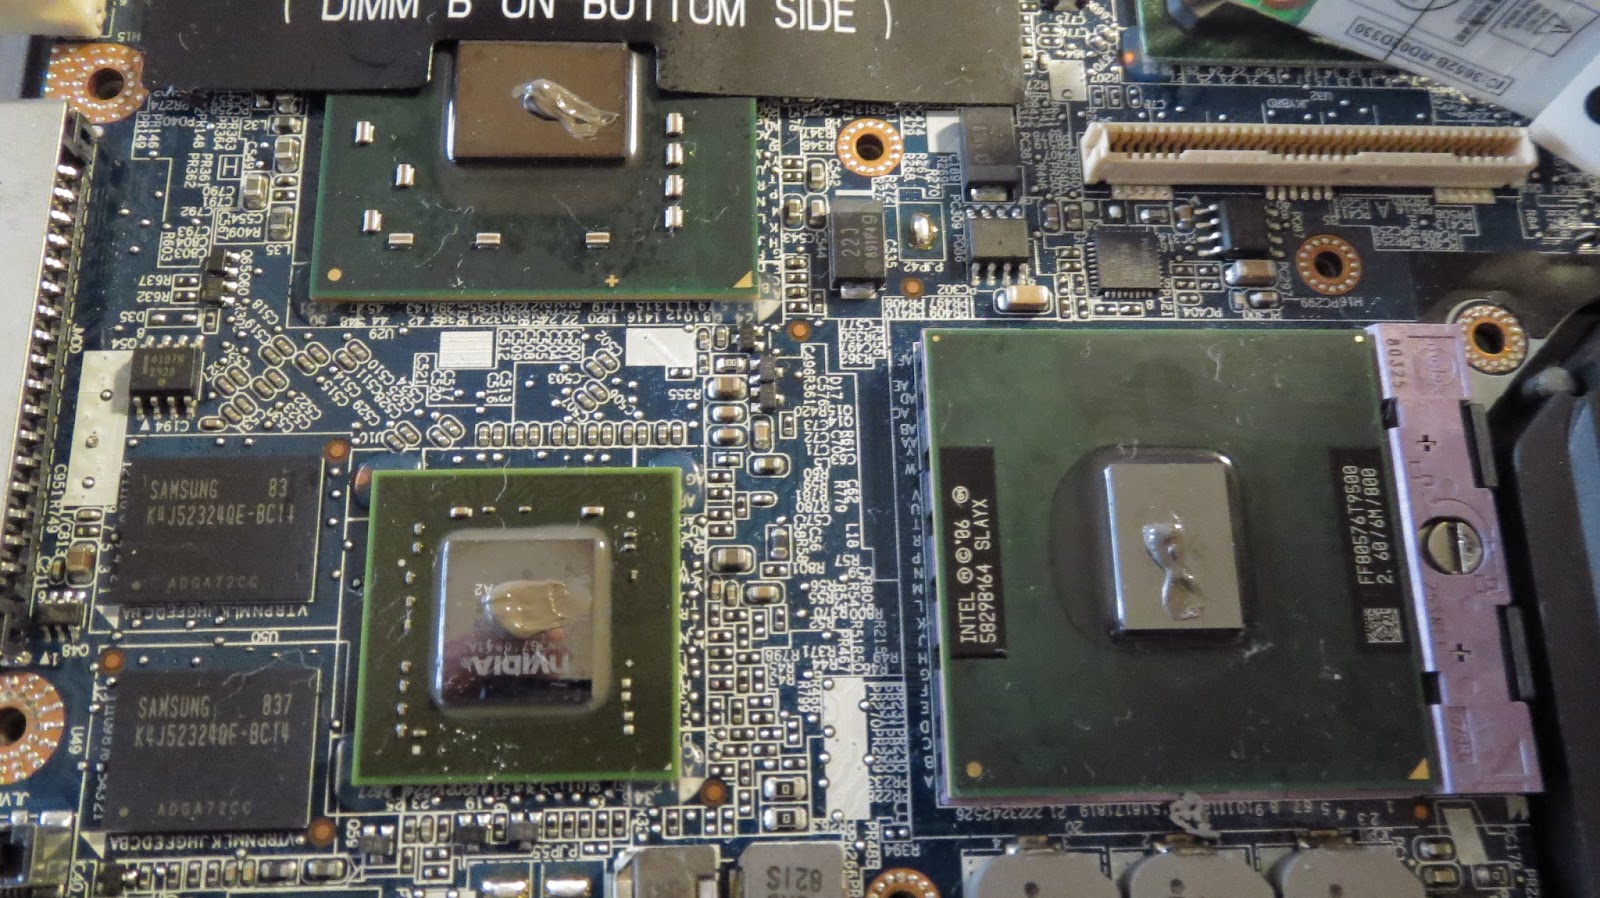
Here's a picture of the thermal pads over the chipset controller and the 128MB NVIDIA Quadro NVS 135M.

Removing the heatsink, the fan assembly is a different part. The heat sink was clean, but space between the fan and the heat sink was caked with dust.

Below is a picture of the stock thermal compound over the CPU.


In place of the original the thermal pads, I used a 1.2mm copper shim.


Clean off the original thermal compound using high isopropyl alcohol.

Reapply a thin layer of Arctic Silver 5 over the contact areas of the heatsink.


Place the 1.2mm copper shims over the video processor and chipset controller.

Reattach everything and all done.

Update 2015-12-21 - Memory Upgrade
Another reason the Dell Latitude D630 is a great laptop is because it supports 8GB memory. Now installing the memory is another story. One memory bay is where it should be, on the bottom of the computer in a user accessible bay. The other is under the keyboard. Argh!


The first memory module is easy to install. Simply unscrew the user accessible panel underneath the computer and replace the existing memory module.


For the second memory module, remove the power button panel from right to left. Unscrew the keyboard and pull up.


Replace the second memory module and put everything back together the way you found it and all done.

Update 2015-12-21 - 2nd HDD Caddy
These days, I don't have a need for an optical drive, so I've replaced it with a 2nd HDD caddy. I got it here from amazon.com. This model didn't come with the spring loaded handle to remove the caddy, so I took it off the original optical drive and attached it to the caddy.


Is it possible to set up RAID 0 with that drive caddy?
ReplyDeleteHow noticable was the cooling mod?
Hello, RAID 0 cannot be setup via hardware, however, I think drive spanning can achieved through software.
DeleteThe cooling mod is not cosmetically noticeable. For this machine, I don't think I took a before and after metric for how much of a difference the cooling mod made, however, the arctic silver on the processor definitely improves overall cooling by reducing the operating temperature approximately 5-10 C. For the GPU cooling mods where a copper shim is added improves overall cooling by reducing the operating temperature approximately 10-20 C.
Overall the cooling mod adds system stability by bringing operating temperatures down.
MY OLD IS D630 INTEL UMA
ReplyDeleteI CHANGE CPU FROM T7300 TO T9300
AND 2 *2GB HYNIX MEMORY
I LOVE IT
Which copper shims did you use? I haven't found a set that has both the GPU and chipset.
ReplyDelete